【技术分享】Osmocom-BB项目安装与配置(含错误解决方法)
作者:admin | 时间:2016-9-27 13:51:37 | 分类:黑客技术 隐藏侧边栏展开侧边栏

什么是Osmocom-BB
OsmocomBB(Open source mobile communication Baseband)是国外一个开源项目,是GSM协议栈(Protocols stack)的开源实现。其目的是要实现手机端从物理层(layer1)到layer3的三层实现,主要进行2G网短信嗅探。
Osmocom-BB项目分析
测试环境:VM虚拟机Ubuntu 64 (有个kali 1.0.9)
打开新的终端都用root权限来执行命令:sudo -i
我的目录路径位:/home/seeu/
一.安装编译osmocomBB所需的软件包:
|
1
2
|
aptitude install libtool shtool autoconf git-core pkg-config make gcc
apt-get install build-essential libgmp3-dev libmpfr-dev libx11-6 libx11-dev texinfo flex bison libncurses5 libncurses5-dbg libncurses5-dev libncursesw5 libncursesw5-dbg libncursesw5-dev zlibc zlib1g-dev libmpfr4 libmpc-dev
|
二.OsmocomBB交叉编译环境 (下载环境包 解压 把gnuarm-xxx目录下的文件搬到gnuarm):
|
1
2
3
4
5
|
wget http://gnuarm.com/bu-2.15_gcc-3.4.3-c-c++-java_nl-1.12.0_gi-6.1.tar.bz2
tar xf bu-2.15_gcc-3.4.3-c-c++-java_nl-1.12.0_gi-6.1.tar.bz2
mv gnuarm-* ~/gnuarm
echo "export PATH=\$PATH:/home/seeu/gunarm/bin">/seeu/.bashrc
source /home/seeu/.bashrc
|
三.下载gnu-arm-build.2.sh 加权限 在添加三个文件夹 并且在src目录下下载三个文件:
|
1
2
3
4
5
6
7
8
9
10
11
12
13
14
15
16
17
18
19
20
21
22
23
24
25
|
wget -c http://bb.osmocom.org/trac/raw-attachment/wiki/GnuArmToolchain/gnu-arm-build.2.sh
chmod +x gnu-arm-build.2.sh
mkdir build install src
cd /home/seeu/src/
wget http://www.gnuarm.com/bu-2.16.1_gcc-4.0.2-c-c++_nl-1.14.0_gi-6.4_x86-64.tar.bz2
wget http://ftp.gnu.org/gnu/binutils/binutils-2.21.1a.tar.bz2
wget ftp://sources.redhat.com/pub/newlib/newlib-1.19.0.tar.gz
cd ..
./gnu-arm-build.2.sh
四.编译libosmocore,OsmocomBB:
cd /home/seeu/
git clone git://git.osmocom.org/libosmocore.git
cd libosmocore/
autoreconf -i
./configure
make
make install
cd ..
.ldconfig
git clone git://git.osmocom.org/osmocom-bb.git
cd /home/seeu/osmocom-bb
git checkout --track origin/luca/gsmmap
cd src
git pull --rebase
make
|
如果没有错误的话,那么恭喜你,环境设置已完成。
常见错误请看下面:
错误一:
|
1
2
3
4
5
6
7
8
9
10
11
|
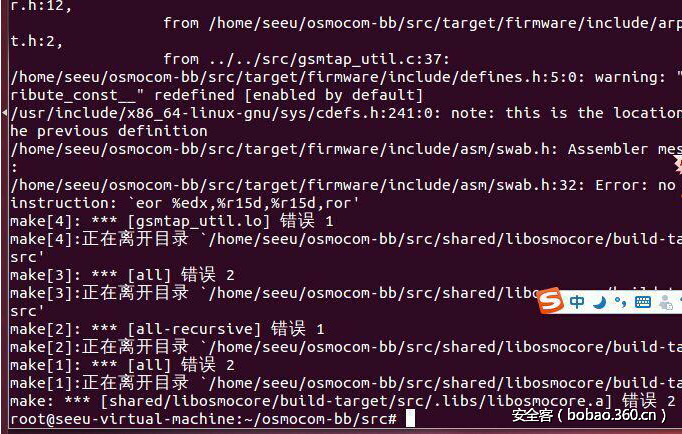
/root/osmocom-bb/src/target/firmware/include/asm/swab.h: Assembler messages:
/root/osmocom-bb/src/target/firmware/include/asm/swab.h:32: Error: no such instruction: `eor %edx,%ecx,%ecx,ror’
make[4]: *** [gsmtap_util.lo] 错误 1
make[4]: Leaving directory `/root/osmocom-bb/src/shared/libosmocore/build-target/src’
make[3]: *** [all] 错误 2
make[3]: Leaving directory `/root/osmocom-bb/src/shared/libosmocore/build-target/src’
make[2]: *** [all-recursive] 错误 1
make[2]: Leaving directory `/root/osmocom-bb/src/shared/libosmocore/build-target’
make[1]: *** [all] 错误 2
make[1]: Leaving directory `/root/osmocom-bb/src/shared/libosmocore/build-target’
make: *** [shared/libosmocore/build-target/src/.libs/libosmocore.a] 错误 2
|
或者
|
1
2
3
|
configure: error: C compiler cannot create executables
See `config.log’ for more details
make: *** [shared/libosmocore/build-target/Makefile] 错误 77
|
这两个错误都是OsmocomBB交叉编译环境出现问题,因为网上很多文章说一半不说一半导致 没安装好标题二里面的环境包又或者你的环境包下载错了
解决:
安装
32位架构
|
1
2
3
|
wget http://gnuarm.com/bu-2.15_gcc-3.4.3-c-c++-java_nl-1.12.0_gi-6.1.tar.bz2
tar xf bu-2.15_gcc-3.4.3-c-c++-java_nl-1.12.0_gi-6.1.tar.bz2
mv gnuarm-* ~/gnuarm
|
64位架构
|
1
2
3
|
wget http://www.gnuarm.com/bu-2.16.1_gcc-4.0.2-c-c++_nl-1.14.0_gi-6.4_x86-64.tar.bz2
tar xf bu-2.16.1_gcc-4.0.2-c-c++_nl-1.14.0_gi-6.4_x86-64.tar.bz2
mv gnuarm-* ~/gnuarm
|
错误二:
|
1
2
3
|
make[1]: *** [board/compal_e88/hello_world.compalram.elf] 错误 1
make[1]: Leaving directory `/root/osmocom-bb/src/target/firmware’
make: *** [firmware] 错误 2
|
解决:
执行
|
1
2
|
git clean -dfx
make
|
错误三:
解决:
安装
|
1
2
|
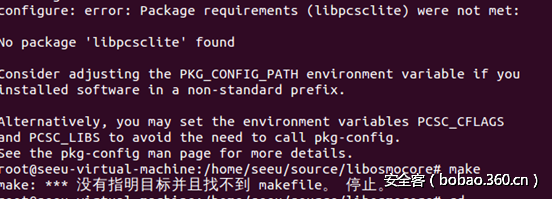
sudo apt-get install libusb-dev libpcsclite-dev
sudo apt-get install libusb-0.1-4 libpcsclite1 libccid pcscd
|
错误四:
解决:
安装
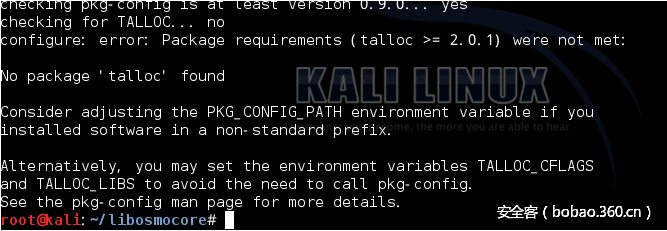
http://www.linuxfromscratch.org/blfs/view/cvs/general/talloc.html
————————————————————————————————————
终于到了折腾硬件了,嘿嘿
设备:
MOTOROLA_C118手机
CP201X(USB to TTL)
数据线
(某宝买现成的线)
五.关机插入USB,写入代码
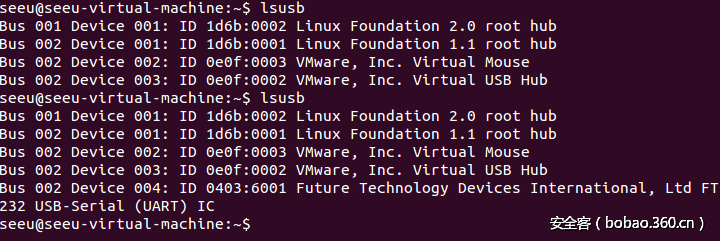
lsusb //查看是否插入成功
|
1
2
|
cd /home/seeu/osmocom-bb/osmocom-bb/src/host/osmocon/
./osmocon -m c123xor -p /dev/ttyUSB0 ../../target/firmware/board/compal_e88/layer1.compalram.bin
|
按一下开机键(短按,不是长按)
有时候停了 就按一下开机键(我有时候需要按几次才完全写入的)
看到这里就写入成功了。手机上也出现 layer 1 osmocom bb
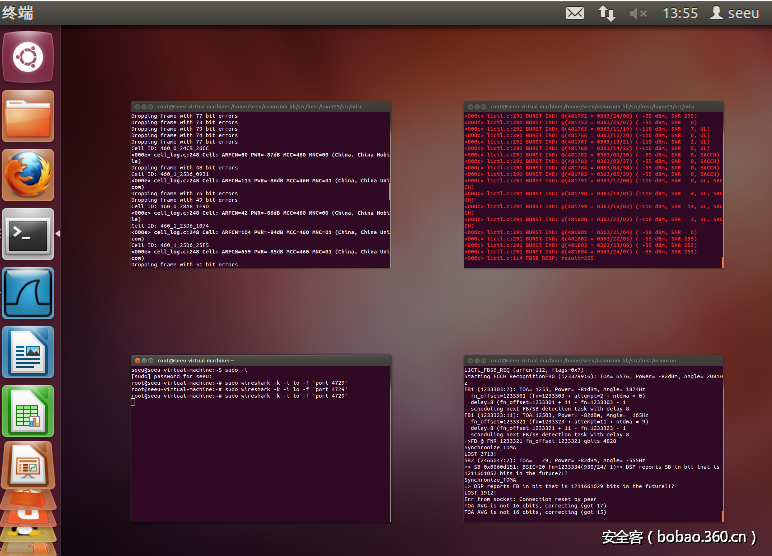
六.打开新终端输入
B终端
|
1
2
|
cd /home/seeu/osmocom-bb/src/host/layer23/src/misc/
./cell_log -O //搜索附近伪基站
|
C终端
|
1
2
|
cd /home/seeu/osmocom-bb/src/host/layer23/src/misc/
./ccch_scan -i 127.0.0.1 -a ARFCN (如刚刚搜索附近的伪基站 ./ccch_scan -i 127.0.0.1 -a 46)
|
D终端
|
1
|
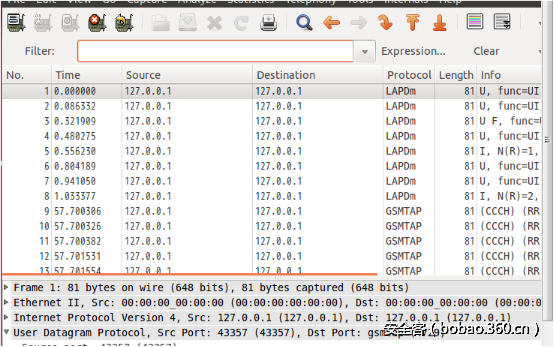
wireshark -k -i lo -f 'port 4729' //打开ws开始抓包
|
筛选gsm_sms //这里我就不截图了,农村没有抓到。
以上常见错误:
错误一:
解决:
是串口问题
虚拟机-设置-添加-串行端口
http://www.ithao123.cn/content-2439912.html
错误二:
虚拟机插入USB没反应
解决:
计算机-属性-高级设置-服务 找到VMxxxx-USB点击启动 然后重新打开虚拟机
错误三:
手机写不进代码
解决:
拔电池 重新来!
装逼图:
————————————————————————————————————
网上比较好的文章:
http://bbs.pediy.com/showthread.php?t=190535
http://www.blogjava.net/baicker/archive/2013/11/13/406293.html
本文由 安全客 原创发布,作者:226SaFe_怪大叔
